
The first step towards making an 1850’s ballgown was to create a new crinoline cage. I have an 1860’s one, but that one is elliptical and rather large. Although fun, it’s not super convenient to dance in, especially if you’re dancing with another lady also wearing one (yes, I’m speaking from experience).
So for the Victorian ball, I’m aiming for an earlier, rounder, and slightly smaller type of hoop. I decided to use the TV 1858 crinoline cage pattern, as that was what I had on hand.
The main construction is to first make the bag for the bottom, and sew the channels in place while keeping the front top open. Then next you cut all the boning, put the bottom boning in the channels in the bag, and cut the boning casing for the top. You put the bones in the casing for the top, and then make the vertical tapes. Finally, you slide the boning through the tapes, and attach the bones to themselves on the ends to form hoops.

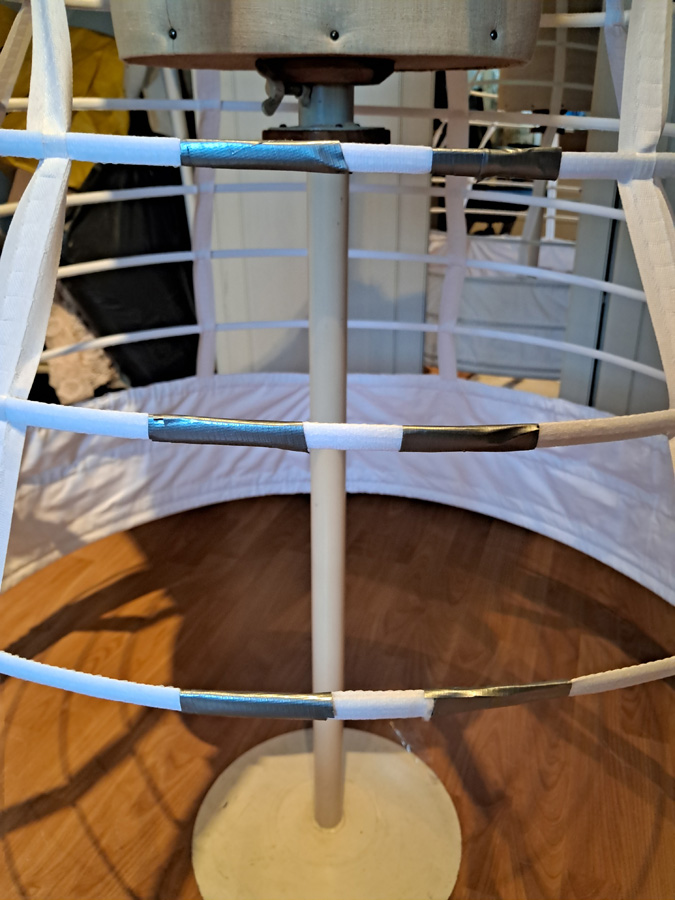
For this project, I decided to go as easy as I could make it on myself material wise. The bag is white cotton, and the bottom hoops are 11mm steel. Since we cannot get bone casing wide enough for 11mm steels, I got 6mm steel for the top hoops, as well as bone casing meant for bra underwires.
They’re a very tight fit, but they fit, and this was easier than sewing my own boning casing.
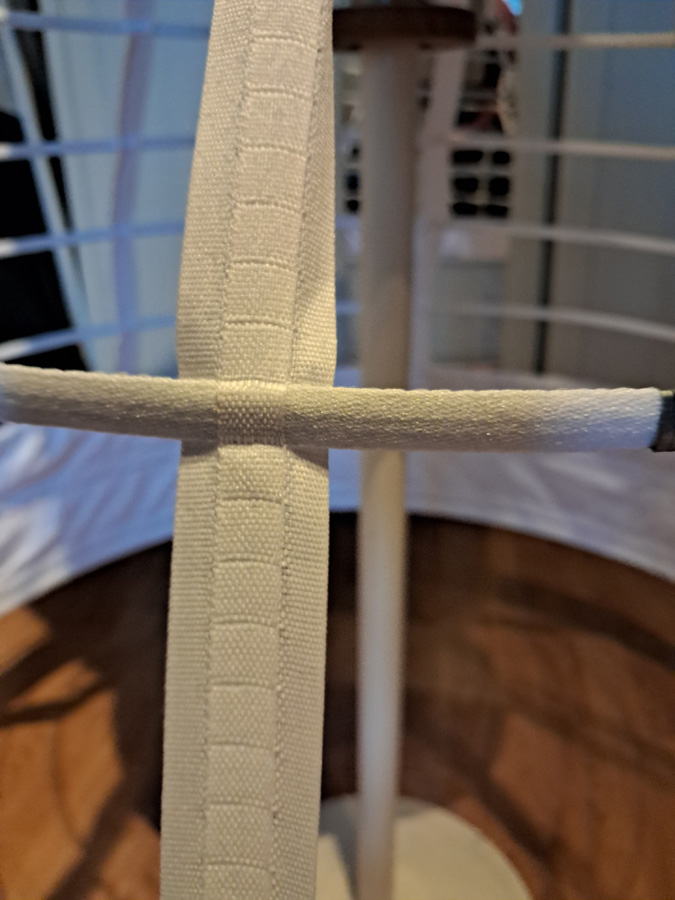
For the vertical ribbons, I got curtain tape, which actually has little built in ‘loops’ which fit the 6mm boning in casing exactly. This means no sewing tapes, and because they’re quite tight they don’t really slide on their own, which means I didn’t even bother sewing the tapes to the bone casing except on the ends of hoop 1 and 2, which are open.

To attach the hoop ends to each-other, I opted to just use ductape. It’s not the prettiest, and doesn’t look very historical, but so far it seems to hold up fine. Again, this was what I had on hand, and was by far the easiest option, so I call that a win!
The final step is the top belt, but at this point I first needed to lengthen my tapes by a good bit. I don’t consider myself very tall, for a Dutch women I’m below average, but at 1,67m TV patterns tend to be short on me, and I needed almost 10cm at the top here as well. If you’re taller than me, I would perhaps even recommend shifting the height of the hoops as well. For me, just extending the top a bit worked fine. I haven’t made a proper ‘belt’ yet, but for now the ribbon tied in place will work. I will probably try it on when next wearing a corset for fitting, and sew on hooks to close it that way.
So the first project of 2024 is done, and that opens the door to start the actual dress!

I also might make another petticoat at some point, as my 1840’s petticoat only just reaches the top of the hoop bag, so is a bit short. For my velvet 1860’s dress I used a black petticoat, but that won’t work with the white silk, so a proper white one will be necessary.

Utiliser du ruban à ruflettes rideaux, quelle bonne idée!!