
For the Victorian ball in Bath in May, I’ll be making a ball gown out of white silk and black lace. It’s the perfect opportunity to finally use some of the antique lace I’ve had in my stash for a while.
Something like this is the plan:

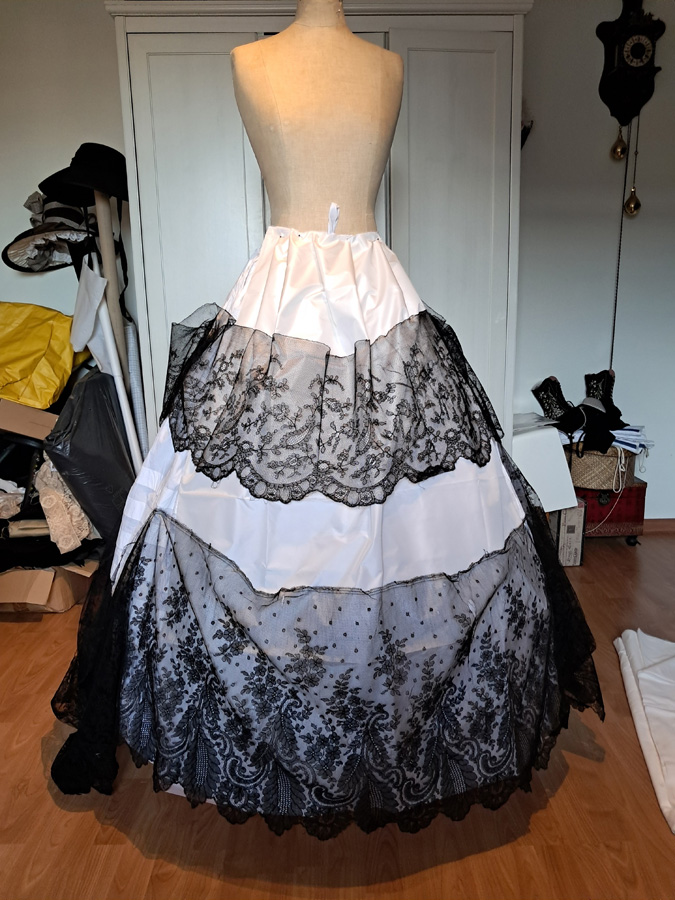
However, I am somewhat limited by the antique lace that I have. I have one very wide piece 4,8m long, and one, slightly less wide, piece which is almost 3m long.
Most 1850’s skirts are rectangles, and have a hem circumference of about 4,5-5m. But this means that any piece of lace which goes all the way around the skirt also needs to be at least 4,5m long, or even a bit more. It’s prettier if the lace is every so slightly gathered at the top. My longer piece of lace has that, but the shorter one definitely doesn’t reach that length.
So the ‘simple’ method of using a rectangle and slightly gathering the lace in tiers won’t work, as my lace isn’t enough for that.
My back-up plan is to do something like this, but with two tiers instead:

This fashion plate is a little earlier (late 1840’s), but the way the lace on the blue dress is positioned would still work for the 1850’s. Although the ’50s loves tiered skirts, this seems like a good back-up plan.
However, the other option to get around this, is to draft a gored skirt instead. This means that the skirt is made up of rectangle-like panels which are narrower towards the top, and wider towards the bottom. I’d still get the ca 4,5-5m hem circumference to fit around the hoop, but towards the top, where the shorter lace will go, the skirt will also be narrower.
This type of construction is more common for the 1860’s than the 1850’s, but I did find some examples of round hoop patterns which seem to use this, so it’s plausible for a late 1850’s ensemble.
So, next up was to see: 1) what would the skirt gores need to look like for my narrow lace to fit? And 2) would this pattern still look ‘full’ enough around my hoop, and not be too narrow. I definitely want to avoid having a hoop too large for the skirt, and getting the look of skimping on materials.
I can imagine my process in figuring this out might be helpful for others, so I’ll take you through this step by step! There’s a little math involved, but don’t worry, it’s nothing more complex than multiplying or dividing things by 3.
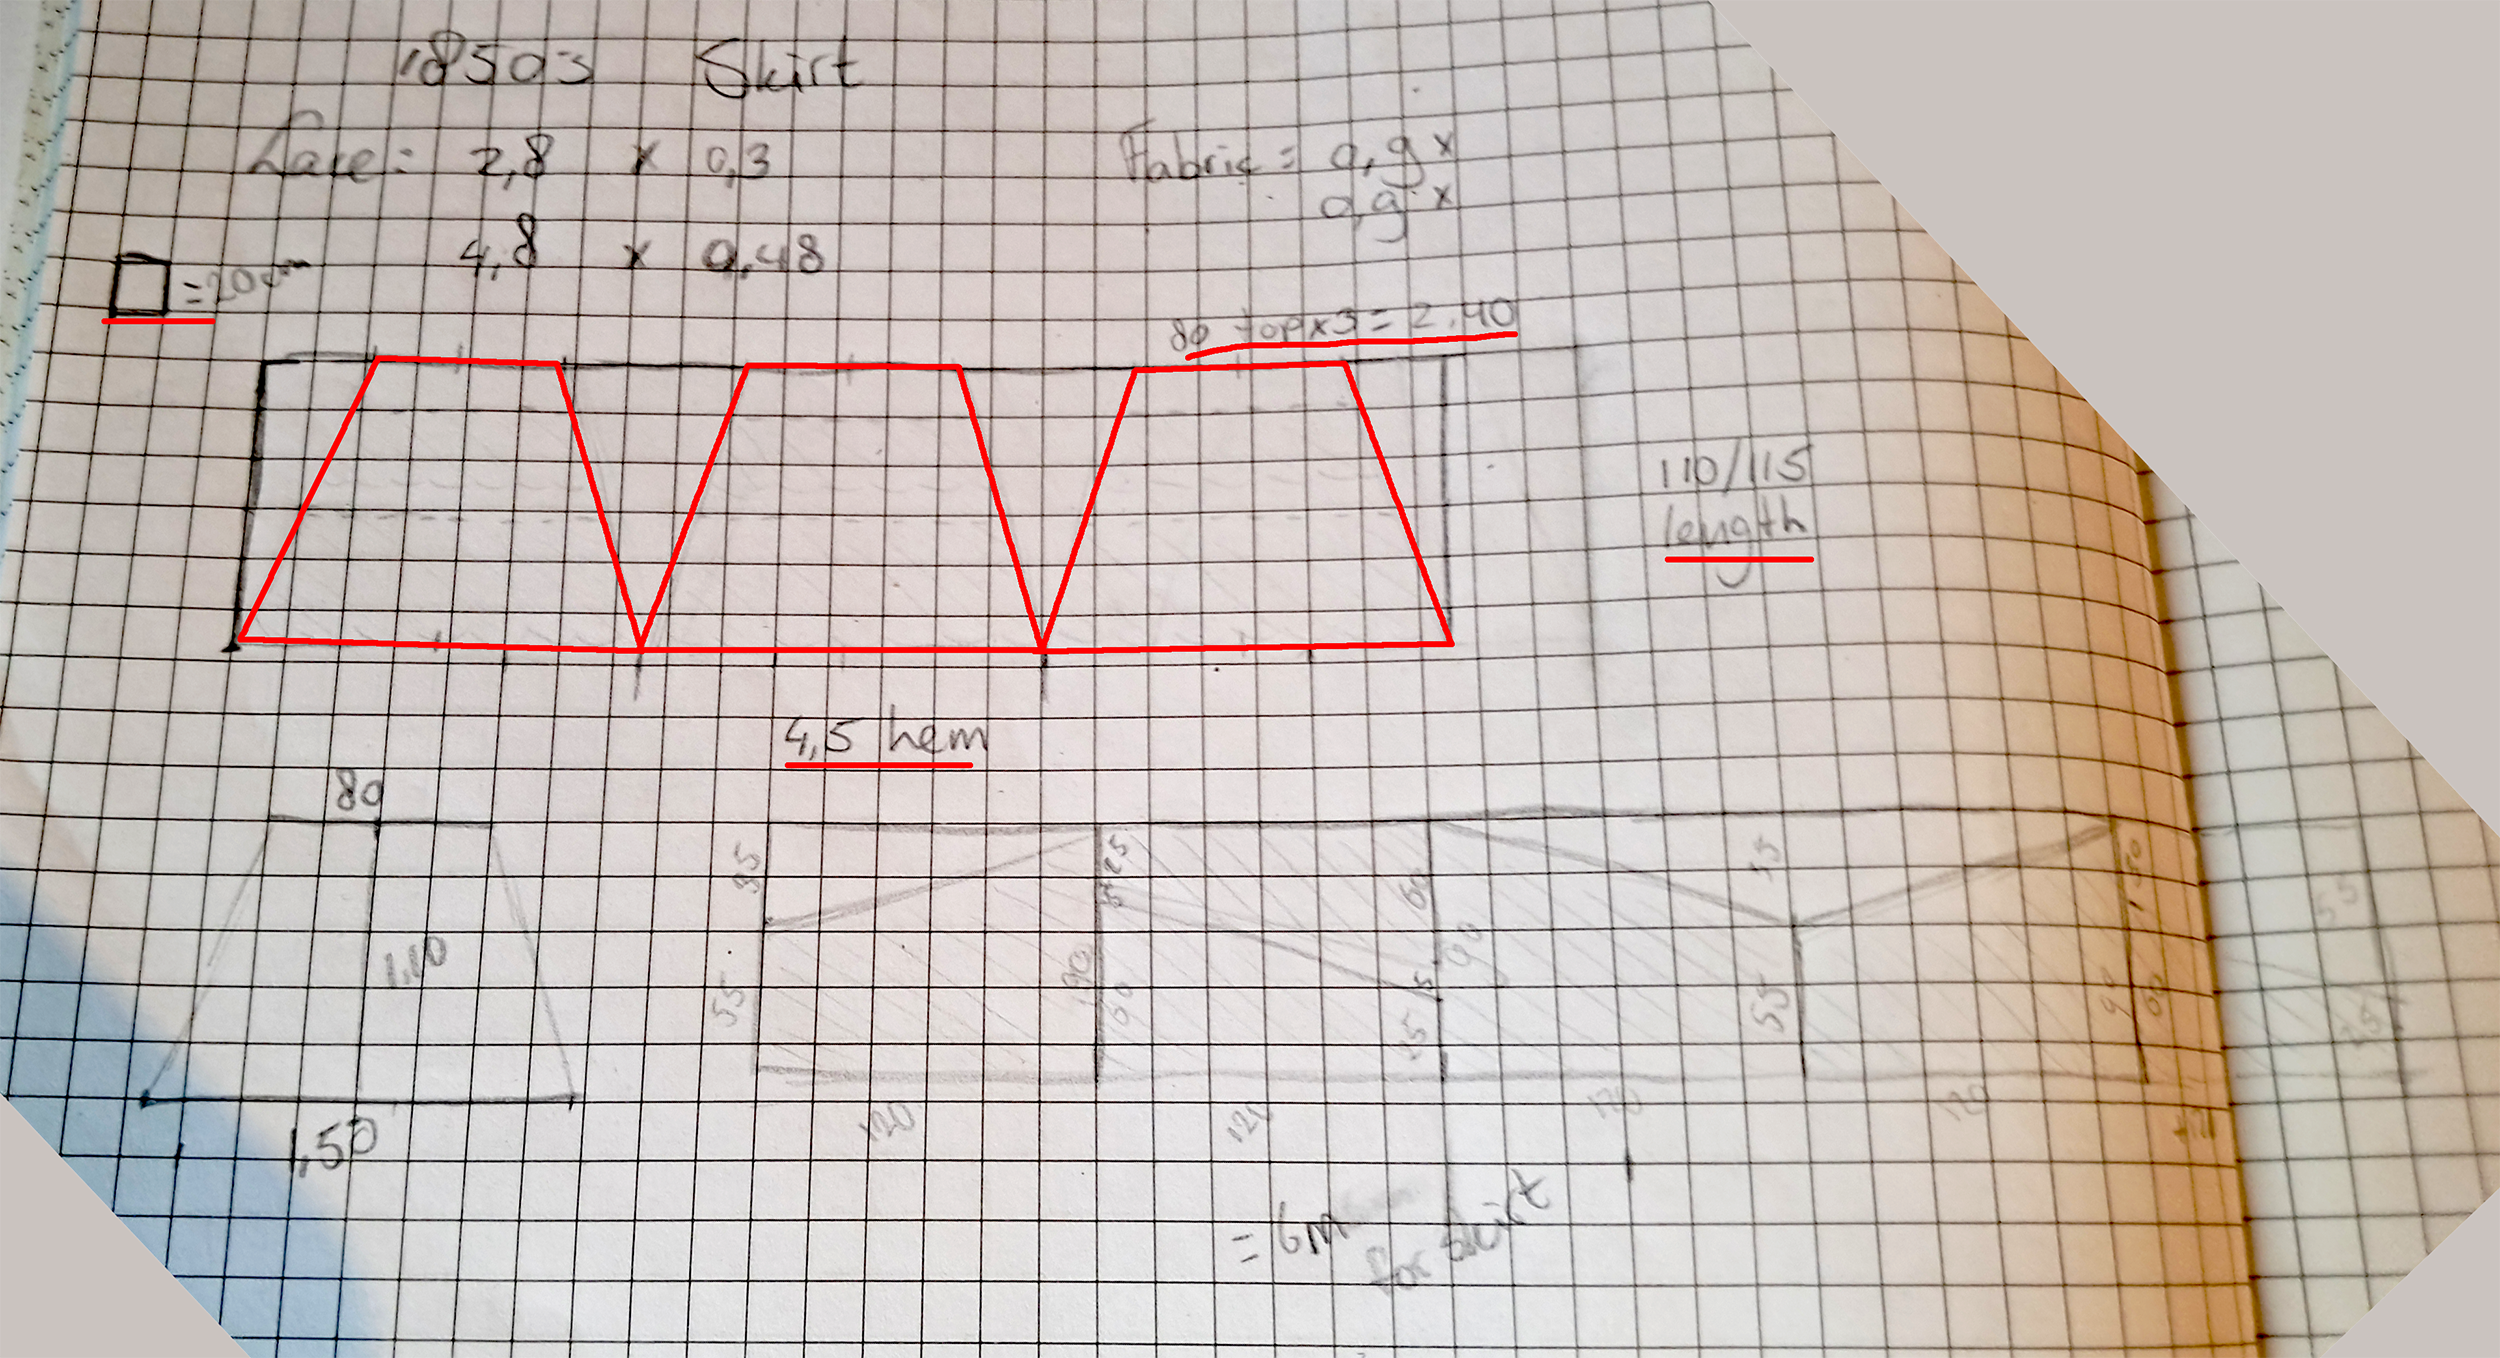
To figure out 1), I drew a 3-gore pattern. I want at least 4,5m hem, so with 3 gores that means 1,5m per gore at the bottom. I want the top of the skirt to be at least 3x my waist size, so that I can pleat the fabric at the top fully. My corseted waist is about 70cm. I have 3 gores, so that means at least 70m at the top per gore. However, ideally, the top is a little bit more to allow for cartridge pleats at the back, which take a bit more fabric. So I chose to make the top of the gores 80cm in my drawing. See the red parts for the main pattern.
Next up was to determine roughly where on the pattern the lace would sit. For this, I pinned the lace to the petticoat on top of my hoop, playing until I liked the rough height of it, and then measured where the top edge sat.
For the top lace, I ended up around 20cm below the waistline, and for the bottom around 60cm below the waistline. From this, I guess I could technically calculate how wide the gores would be around that point, but that’d take a lot of math. I’m not against that per definition, but just measuring my little scale pattern was a LOT easier, and gives me good enough an approximation. I drew the lace ‘lines’ on, see the blue highlights. Basically, for the top lace I measured about 90cm per panel, makes 2,8m. So that’s actually quite perfect for my 2,8m length of lace! This particular piece is actually slightly curved so it’s shorter at the top, so it should still hang over the skirt well even though it’s wider at the bottom of the lace. For the bottom, it’d be around 3,5m, which I already knew would work for the 4,8m length (as the hem is a little less than that).

So now I knew this pattern would theoretically work with the lace! Next up was figuring out if this pattern would still look good around my hoop. I didn’t want to cut anything to make a mock-up, though, as it takes so much fabric. So I ended up taking the length of cotton which I’ll be using as lining. I pinned the gores into this fabric, so I basically made giant ‘darts’ from the top. I then pinned it into a ‘tube’ to form the skirt, and just left the additional length hanging to the inside for now. This tube I roughly pleated to waist size at the top, and then put over my hoop.
Good news: it fits! I did then also drape my lace on top to double check if my measurements on the pattern were actually correct. It’s always good to double check! This, again, seemed to work out. So with this test, I decided this would indeed be my pattern!

Next step was to figure out how to cut these gores which measure 1,5 at the bottom, 80cm at the top, 1,15 high from a 90cm wide fabric… My white silk is very narrow, so a full panel doesn’t actually fit. I did want to be as efficient in cutting the silk as possible, so I made another sketch. See the green lines in the picture.

This time, I drew the width of the fabric to scale, and then as much of the gore as would fit on one width. What remained I then drew underneath. It actually came out really nicely, and if I staggered the gores, I could fit exactly 2 ‘remainders’ of the gores next to each other on one width of fabric. So basically, I need 3x the length for 2 tiers. For the remaining tier, I need 2 lengths, but there’ll be a little ‘on the side’ leftover which I can use for the bodice later. Doing it this way does mean that I’ll have a slightly ‘off-center’ seam on each skirt tier. However, a lot of the skirt fabric will be covered in lace later, so I don’t might this slight asymmetry if it makes for more efficient fabric use.
So, after all of this, I could finally actually start making the skirt!
I cut the panels whole out of cotton (1,5m wide, so that actually fits), and in 2-parts out of the silk. I stitched the silk together along the selvage to form the full gore.

All panels were then flat lined. My silk is very thin, and quite see-through. I used a thinner white cotton as well, but together they give the skirt a little bit of weight. They’ll be worn over petticoats, so those’ll make up for the last bit of see-through-ness of the skirt itself.

The skirt has a pocket on the right hand side, as I will need a place to store my fan (and phone…).

After the main construction, I first did the hemming. There’s a cotton hem facing, which is machine-sewn to the outside and then whipped to the inside.

To determine the length, I tied a piece of tape around the waist of my dummy, on top of the hoop. I roughly pleated the top, and then pulled the skirt through the tape, until it sat even at the hem. Historical skirts are often evened from the top, and this tape-pull method makes it easier to do this on the dummy.
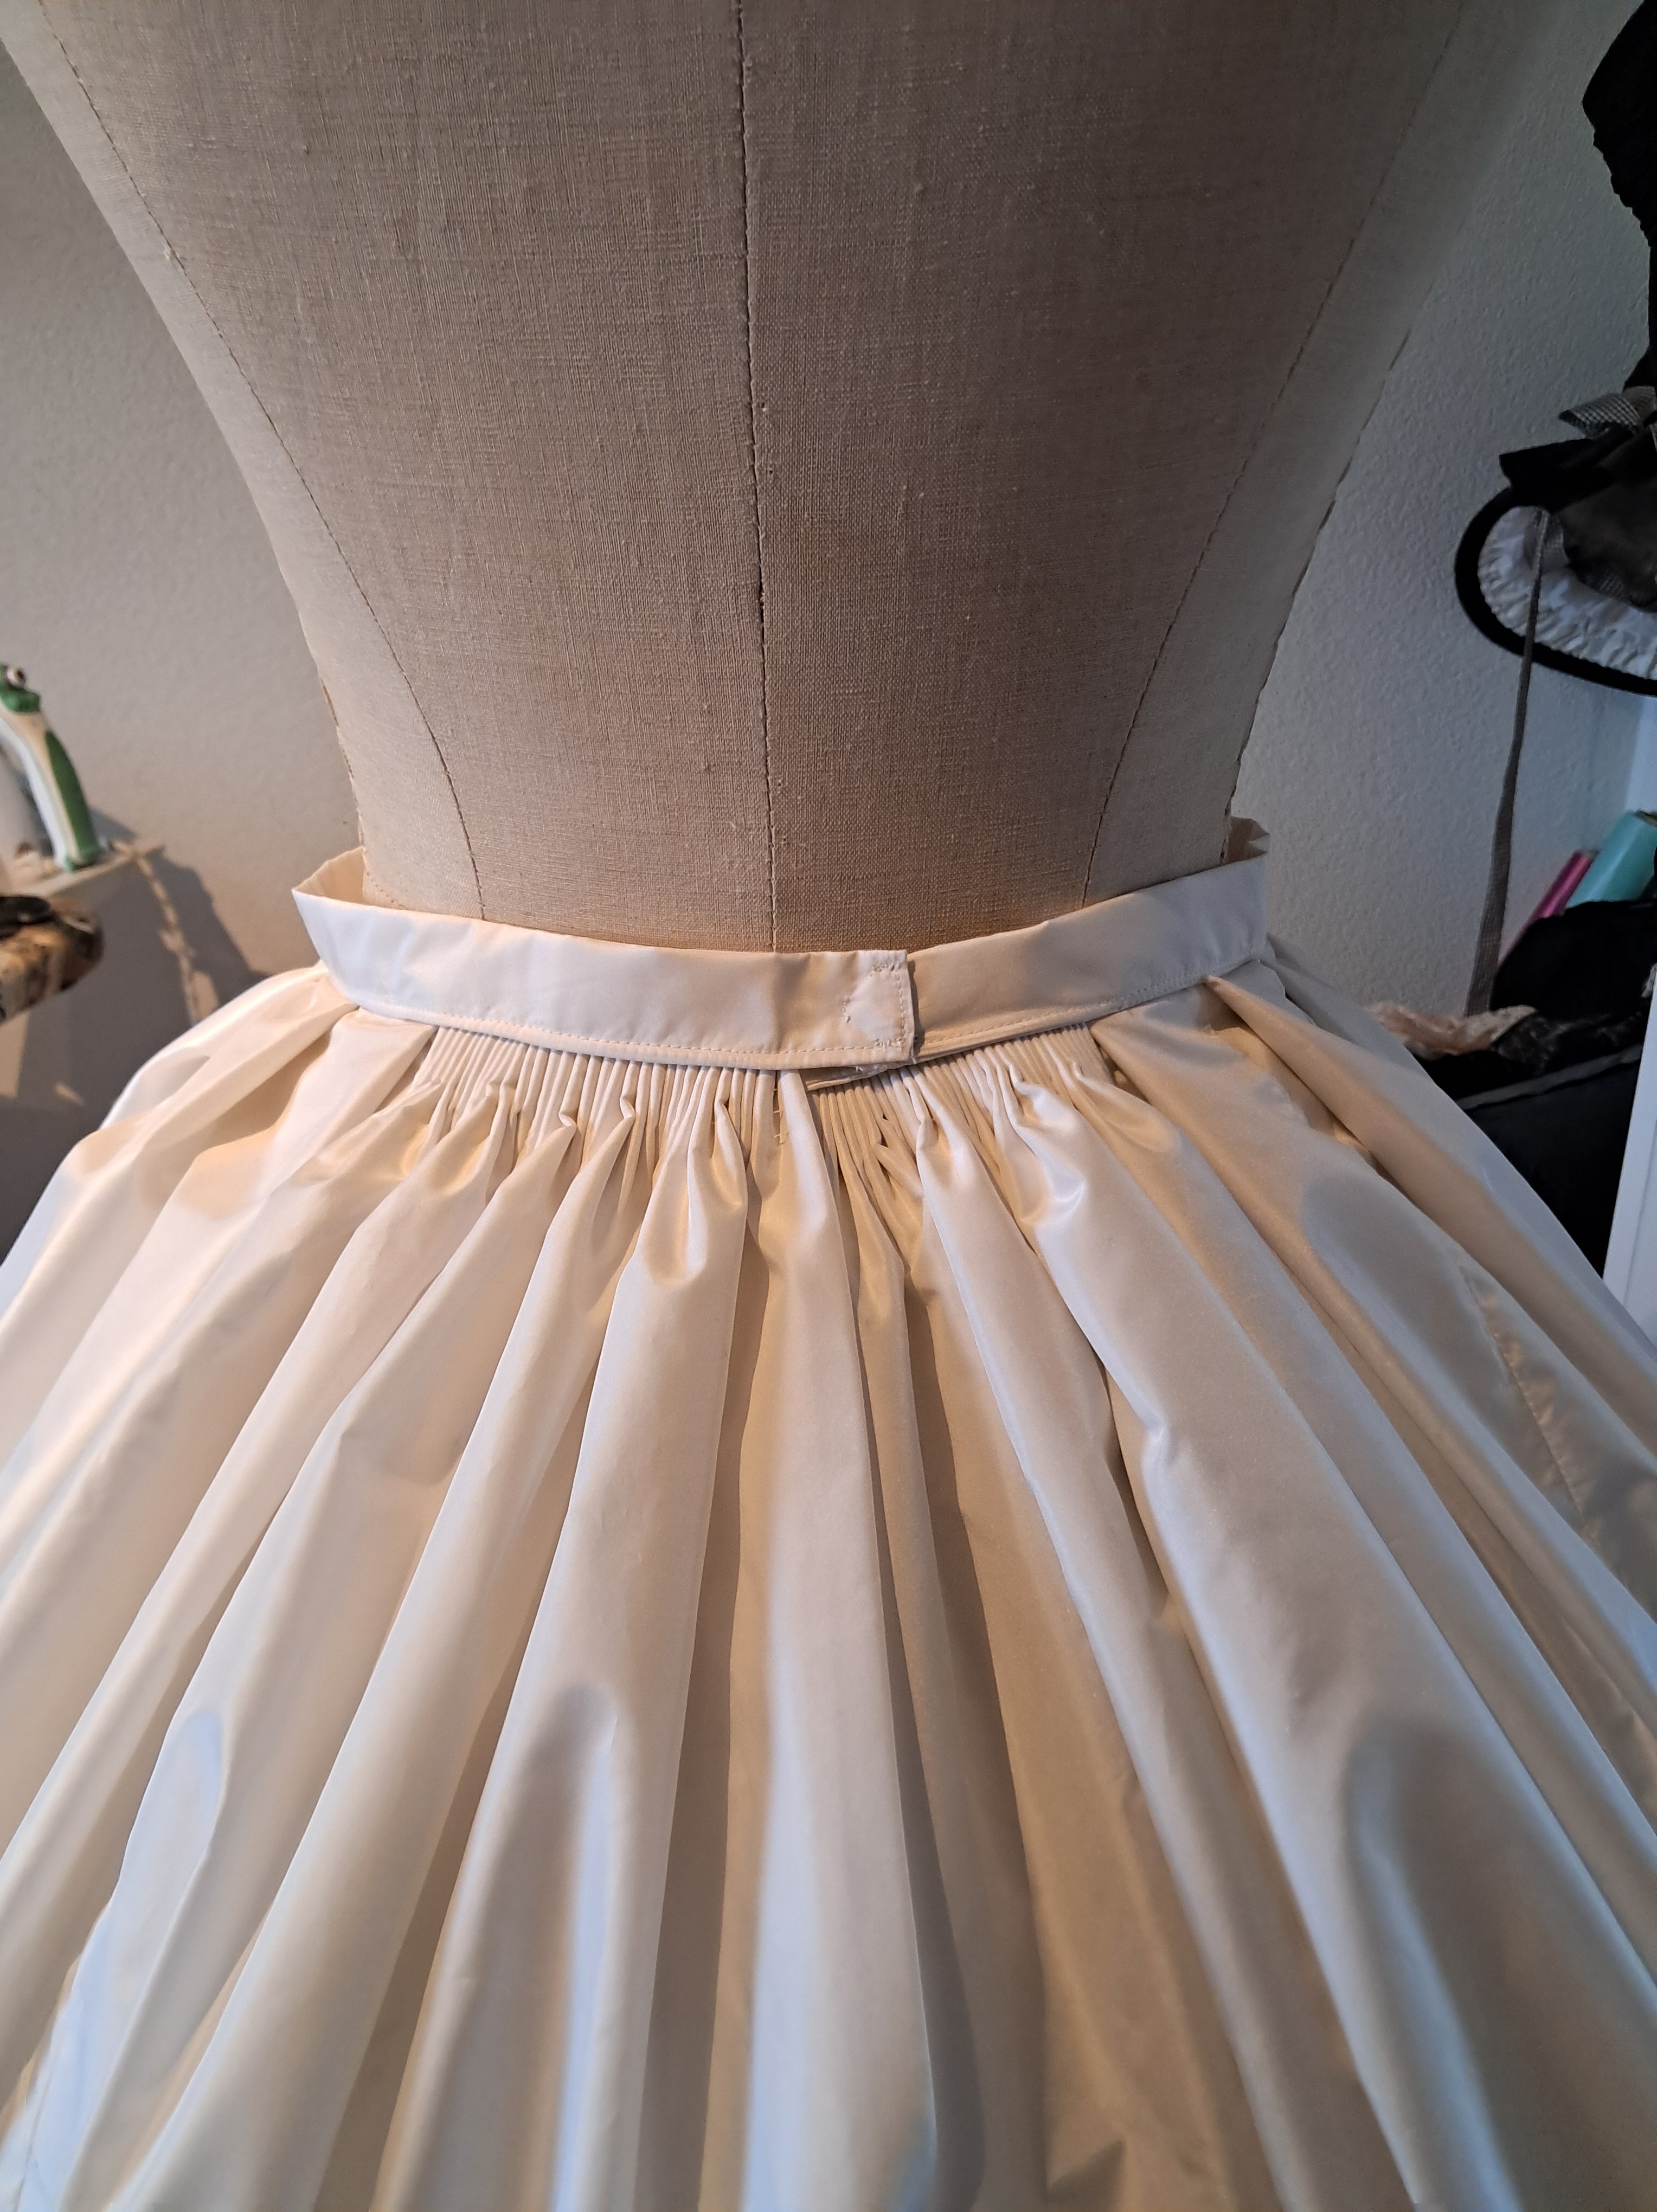
The top of the skirt is folded over to the right height, and then pleated. I pleated until around 2inches from the center back, and then cartridge pleated the last bit towards the back.
Basically, this means running several lines of stitching (4 in this case), with exactly the same spacing, and then pulling in the threads. I used the machine stitching at the top as a guide, and did 3 machine stitches per hand-stitch. The threads are then sewn into place and kept in the skirt to keep in the pleats.


Finally, the skirt was sewn to the waistband. The cartridge pleats need to be done by hand, just catching the outside of each pleat. This way, they won’t fold flat on wearing, and will stand out from the body nicely.

A hook on the edge of the waistband, and my skirt base is done! The lace and trimming will still make quite a bit of difference in the final look, but it’s already a functional skirt.


Once more good for you! I admire your ambition and ability. Although I’ll never join the world of reproduction clothing and its social events en costume, I love reading about it, and just learning more about 19th & early 20th century costume. With much appreciation for your posts.
Pingback: 1850’s ballgown project – final touches | Atelier Nostalgia