
After finishing the skirt base of my 1850’s ballgown, I turned to the bodice. I wanted to get this done before starting the skirt decorations just in case, as a bodice is more crucial for a wearable dress than skirt decorations
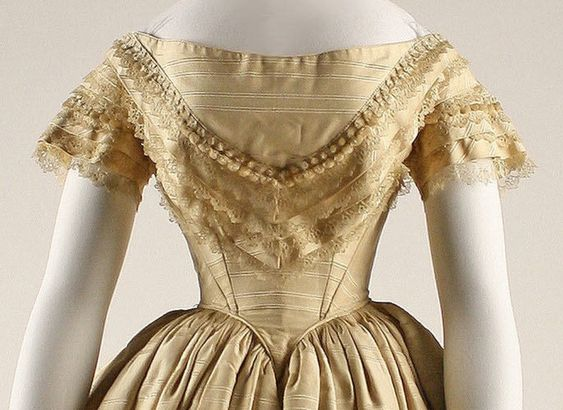
My main inspiration was this fashion plate. The skirt will be very similar, and I like how the bodice echoes the lace theme from the skirts, but includes a little extra interest in form of the bows.

I started from a TV 1860’s day dress pattern, as that’s what I had. After sewing the main base, I realized that in this era many ballgowns actually don’t follow quite the same pattern lines as the day bodices. While most era’s just take the same basic pattern but with a lower neckline, 1850’s/’60s ballgown bodices actually have a full ‘princess’ seam from close to center front to the top. The day-bodices have two darts instead of the one full seam, probably because they come up much higher.
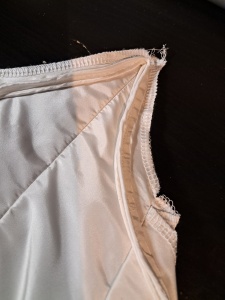
It’s the difference between this (notice the seams running very close to the center front).

And this. Note the two seams starting further out from the center front, and stopping at the bust. Those are the darts.

You do see some evening bodices with the darts though, so I’m not too upset that I followed such a pattern. This is a good example. Although you cannot see how far up the seams go, it does look like 2 darts.
As usual, I started by making a mock-up of my interlining fabric (white cotton) to check the fit, and draw in where I wanted the neckline & waistline as I’m changing those from the original pattern. Then, I flatlined the silk to the cotton pieces. I left a really roomy side seam to allow the bodice to be taken out at a later date.


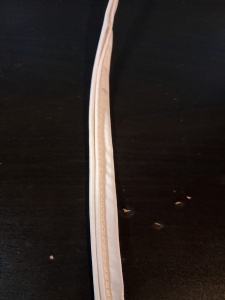
Before sewing the side seam, I finished the bottom edges with double piping. By piping first and then finishing the last seam, you make it a lot easier to take this out in the future. I make double piping by first encasing two narrow cords on two sides of the same strip of fabric. Then this is folded double and stitched so the two cords are nestled together. Then, the piping is sewn to the right side, the allowance flipped to the wrong side, the bodice is trimmed to the edge and it’s hand-sewn in place.


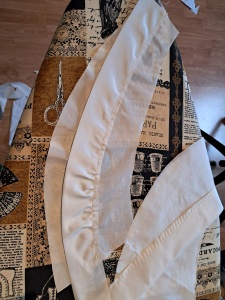
The Bertha is the pleated part at the top of many bodices from the 1830’s to 1870’s. In the ’50s and ’60s, these are very often pleated. However, sometimes they just look like pleats, but are made out of bias cut strips of fabric sewn to a base. I wanted a slightly curved style, which is much easier to do with the bias strips, so I went that route. I first patterned the base by pinning fabric on top of my bodice and tracing the shape. I then slightly gathered the top of folded bias strips to cover the cotton base, and sewed left & right sides together It was lined by sewing the lining piece around the edges and turning it inside out. I did this for front and back separately, and then sewed them together on one shoulder. The other shoulder is left open, as my bodice closes center back and you need to undo the bertha on one side to put it on.


At this point, my sewing machine broke down and the thread at the bottom kept looping up. I took it to the repair shop (service might also have been overdue…), and in the meantime started the hand-sewn eyelets in the back. The back is boned with synthethic whalebone to create some stability, and the eyelets are staggered for spiral lacing. Although corsets in this era are typically laced straight (eyelets directly across each-other), many ballgown bodices still show spiral lacing.


As the machine repair was going to take a little while (at the time of writing it’s still at the shop…), I was lucky enough to be able to borrow my mother’s machine for a bit. I had this machine for about 5 years before getting my own, so it was easy enough to get re-aquainted. I made little capped sleeves (which will mostly be hidden), with piping on the bottom edge, and set these in the bodice.
I finished the Bertha with a little fabric strip center front & back. You see this in originals, and the main reason to add it was that the pleats were just a tiny bit off in lining up beneath that. I decided to add black piping for a little contrast up top, and I like how it balances everything. The bertha is sewn to the neckline with small stitches, except on the left back panel where it’s loose so you can undo it. It hooks/snaps onto the shoulder to close.
It was also time to add the lace to the bottom! I had another piece of antique lace which was the perfect length. As I don’t really like cutting antique laces, this was perfect. However, it was a little bit too wide. I ended up folding it over, so it actually looks like it’s two tiers hanging down, and sewing it on the fold. I think it looks quite deliberate, and it saves the lace piece as it was!


With adding some boning center front (can’t have the point flipping up), the bodice was wearable! At this point I went back to the skirt for decorations. I did actually add bows to the bodice in the end, so I’ll share those together with the skirt trimmings in the next post.

This is lovely; I did something very similar with my own ballgown, including the bias strips and bows on the bertha! Though it didn’t occur to me until afterwards that I didn’t need to add a side closure at all– the bertha was plenty large enough to just drop over my head and snap to my shoulders as long as I kept it otherwise separate from the dress.
Thank you! Yours looks lovely.
Isn’t that bodice looking lovely, and sumptuous with the lace. Yay for conserving it whole…I’ve done that too…and in this case it creates a nuanced color shift that echoes the lines in the bertha.
Very best,
Natalie
Thank you!
Gorgeous! It’s really looking like a real dress now. I can’t wait to see it all together! Victorian is something that I’ve just been getting into after having done 18th century and Regency costume, so I love seeing your detailed posts on this. It’s just beautiful!
-Erin
Thank you!
Pingback: 1850’s ballgown project – final touches | Atelier Nostalgia